

Create Engaging Mouse Move Effects in React with GSAP: A Step-by-Step Guide
Enhance User Interaction and Add Playfulness to Your Interface with Animated Mouse Move Effects


Photo by Lautaro Andreani on Unsplash
Prerequisites
This article was written with the assumption that the reader:
has basic knowledge of React and Javascript
is familiar with CSS, TailwindCSS, or any other CSS library.
What is GSAP?
GSAP is a powerful JavaScript library that helps you create smooth animations and transitions in your web projects. In our example, we'll use GSAP to make objects on the screen follow your mouse cursor.
Setting Up the Project
Before we dive into the code, make sure you have Node.js and npm (Node Package Manager) installed on your computer. If not, you can download and install them from the official website
Now, let's set up a new React project. Open your terminal and run the following commands:
npx create-react-app mouse-hover-effect
cd mouse-hover-effect
npm install gsap
We're creating a new React application called "mouse-hover-effect" and installing the GSAP library. Once that's done, you can open your project folder with a code editor.
If you intend to use Tailwind CSS for styling, follow this guide for installation. Feel free to use vanilla CSS or any other CSS framework or library of your choice.
Creating the App Component
const App = () => {
  return (
    <>
    <div className="min-h-screen bg-black">
      <div className="ball bg-yellow-500 w-4 h-4 fixed top-0 left-0 rounded-full"></div>
      <div className="ball bg-yellow-500 w-4 h-4 fixed top-0 left-0 rounded-full"></div>
      <div className="ball bg-yellow-500 w-4 h-4 fixed top-0 left-0 rounded-full"></div>
      <div className="ball bg-yellow-500 w-4 h-4 fixed top-0 left-0 rounded-full"></div>
      <div className="ball bg-yellow-500 w-4 h-4 fixed top-0 left-0 rounded-full"></div>
      <h2 className="text-center text-4xl font-bold text-blue-900">Mouse Hover Effect</h2>
    </div>
    </>
  );
};
export default App;
To see the app in action, start your development server with the following command:
npm start
Open your web browser and go to http://localhost:3000 You should see a black interface with five yellow balls stacked at the top-right of your screen. We also have a text heading that says "Mouse Hover Effect" at the center of the screen.
Let's Get Our Balls Moving
import React, { useEffect } from "react";
import { gsap } from "gsap";

const App = () => {
  useEffect(() => {
    gsap.set(".ball", { xPercent: -50, yPercent: -50 })
    let targets = gsap.utils.toArray(".ball");
    window.addEventListener("mousemove", (e) => {
      gsap.to(targets, {
        duration: 0.5,
        x: e.clientX,
        y: e.clientY,
        ease: "power1.out",
        overwrite: "auto",
        stagger: 0.02,
      });
    });
  },
[]
);

  return (
    <>
    <div className="min-h-screen bg-black">
    <div className="ball bg-yellow-500 w-4 h-4 fixed top-0 left-0 rounded-full"></div>
      <div className="ball bg-yellow-500 w-4 h-4 fixed top-0 left-0 rounded-full"></div>
      <div className="ball bg-yellow-500 w-4 h-4 fixed top-0 left-0 rounded-full"></div>
      <div className="ball bg-yellow-500 w-4 h-4 fixed top-0 left-0 rounded-full"></div>
      <div className="ball bg-yellow-500 w-4 h-4 fixed top-0 left-0 rounded-full"></div>
      <h2 className="text-center text-4xl font-bold text-blue-900">Mouse Hover Effect</h2>
    </div>
    </>
  );
};

export default App;
.set()is a GSAP method used to set initial properties for elements selected by the specified selector.
gsap.set(".ball", { xPercent: -50, yPercent: -50 });centers all HTML elements with the class "ball" both horizontally and vertically within their parent containers by adjusting the xPercent and yPercent properties using GSAP. The selection of elements can also be done by using React's useRef hook to access DOM elements.
xPercent: -50and YPercent: -50 properties specify the horizontal position and vertical position of the element as a percentage of its width and height, respectively.
gsap.utils.toArray(".ball")is used to select all HTML elements with the class "ball" and convert them into an array. This can be useful when you want to work with multiple elements that share the same class. The resulting array is assigned to the variable targets
gsap.to(targets, { ... });uses GSAP'sto method to animate one or more elements specified by the targets variable. The animation properties and values are defined within the object passed as the second argument.
x: e.clientX, y: e.clientYset the x and y properties of the animation. They are being animated to the current position of the mouse cursor.
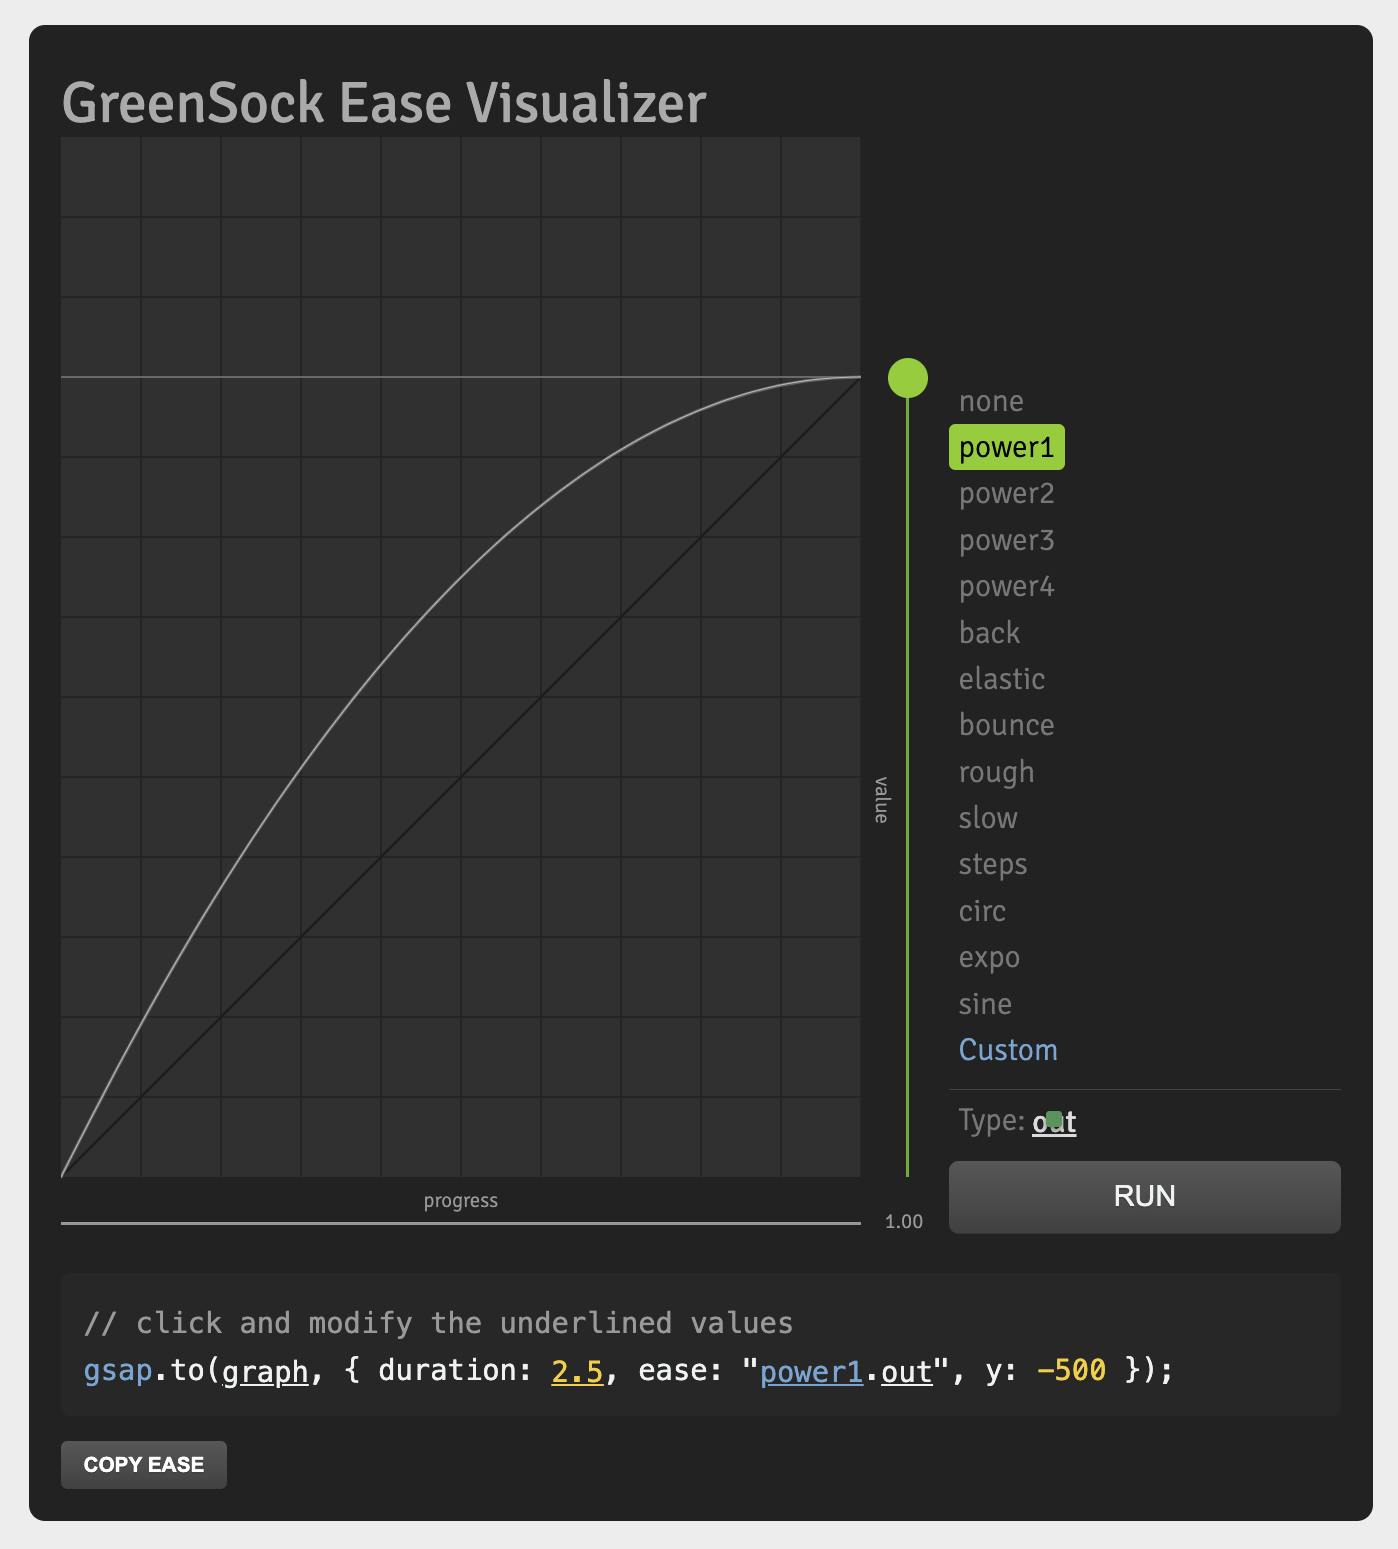
ease: "power1.out"specifies the easing function for the animation. "power1.out" provides smooth acceleration and deceleration.
You can check out GreenSock Ease Visualizer to see and test other easing functions in GSAP
overwrite: "auto"controls how the animation behaves if multiple animations are triggered before the previous one completes. "Auto" means that GSAP will automatically handle overlapping animations, ensuring that the latest animation takes precedence.
stagger: 0.02introduces a stagger effect, meaning that if you have multiple elements in yourtargets array, they will start their animations with a slight delay of 0.02 seconds between each element. This creates a cascading or staggered effect for the animations.
Food is Ready
We've just created a simple yet impressive mouse hover effect using React and GSAP. You can poke around, experiment, and give it your spice.
I hope you found this piece insightful and valuable. If you have any questions or thoughts to share, please do so in the comments. Thank you for reading!
Happy coding!